9-Step Guide to Creating Authentic Paystubs: Empowering Small Business Owners
Table of Contents

1. Introduction
Whether you're just getting your small business off the ground or have been in operation for years, managing payroll is a critical task. Ensuring that each employee's paystubs are accurate, detailed, and professionally done helps maintain transparency and trust within your team. But did you know that you don't need to hire an expensive payroll service to get this done? In this blog post, we'll guide you through nine easy steps to create authentic paystubs on your own. So not only will you save money, but you'll also gain an in-depth understanding of your company's payroll process, which is vital for every small business owner.
2. Authentic Paystubs: A Key to Transparent Business Practices
We only deliver genuine files. In a market flooded with numerous paystub creation tools, many of them rely on open-source and unverified libraries. In contrast, our software employs certified, enterprise-grade libraries to produce authentic PDF files. This means that your employees won't have any issues with their paystubs failing various validations such as 'saved as PDF' or 'generated' file checks. With us, your paystubs will always pass muster.
3. Nine Easy Steps to Create Your Paystub
3.1. Basic Employment Information
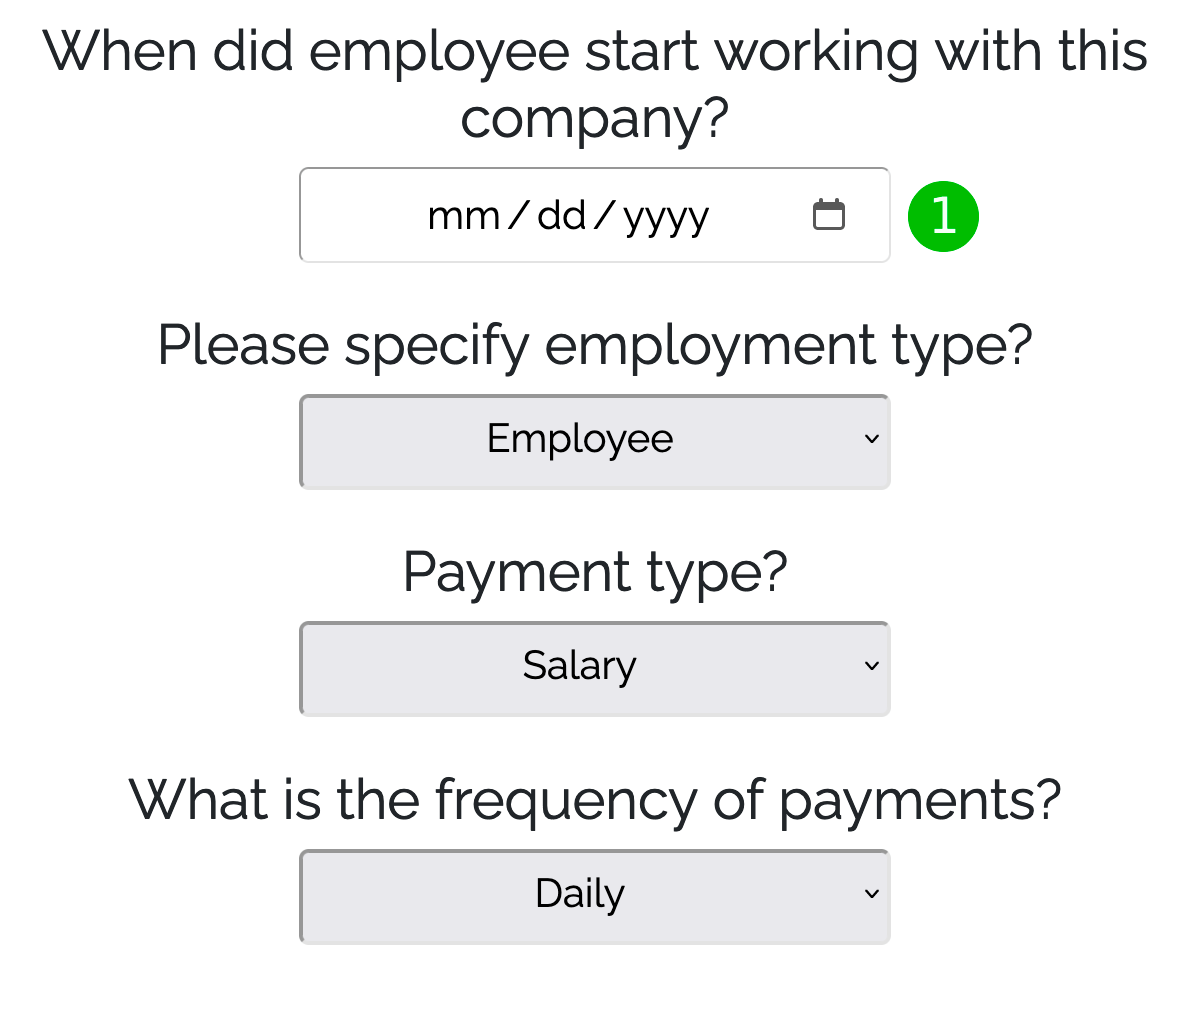
Begin by entering the employee's start date with your company (1). Be attentive, as this date is crucial; it will appear on the actual document and significantly influence year-to-date and sick
hours calculations. Please note that the software will prompt a warning if the employment date is set after the check date.
Next, select the employment type: "Employee" or "Contractor".
Then, choose the payment type: "Salary" or "Hourly". Note that if the employment type is set to "Contractor", only the "Hourly" option will be available for selection.
Finally, determine the frequency of payments. This selection is crucial as it plays a role in year-to-date calculations and payment period determinations. Your available options include "Daily", "Weekly", "Bi-Weekly", "Semi-Monthly", "Monthly", "Quarterly", "Semi-Yearly", and "Yearly".
3.2. Employee Information
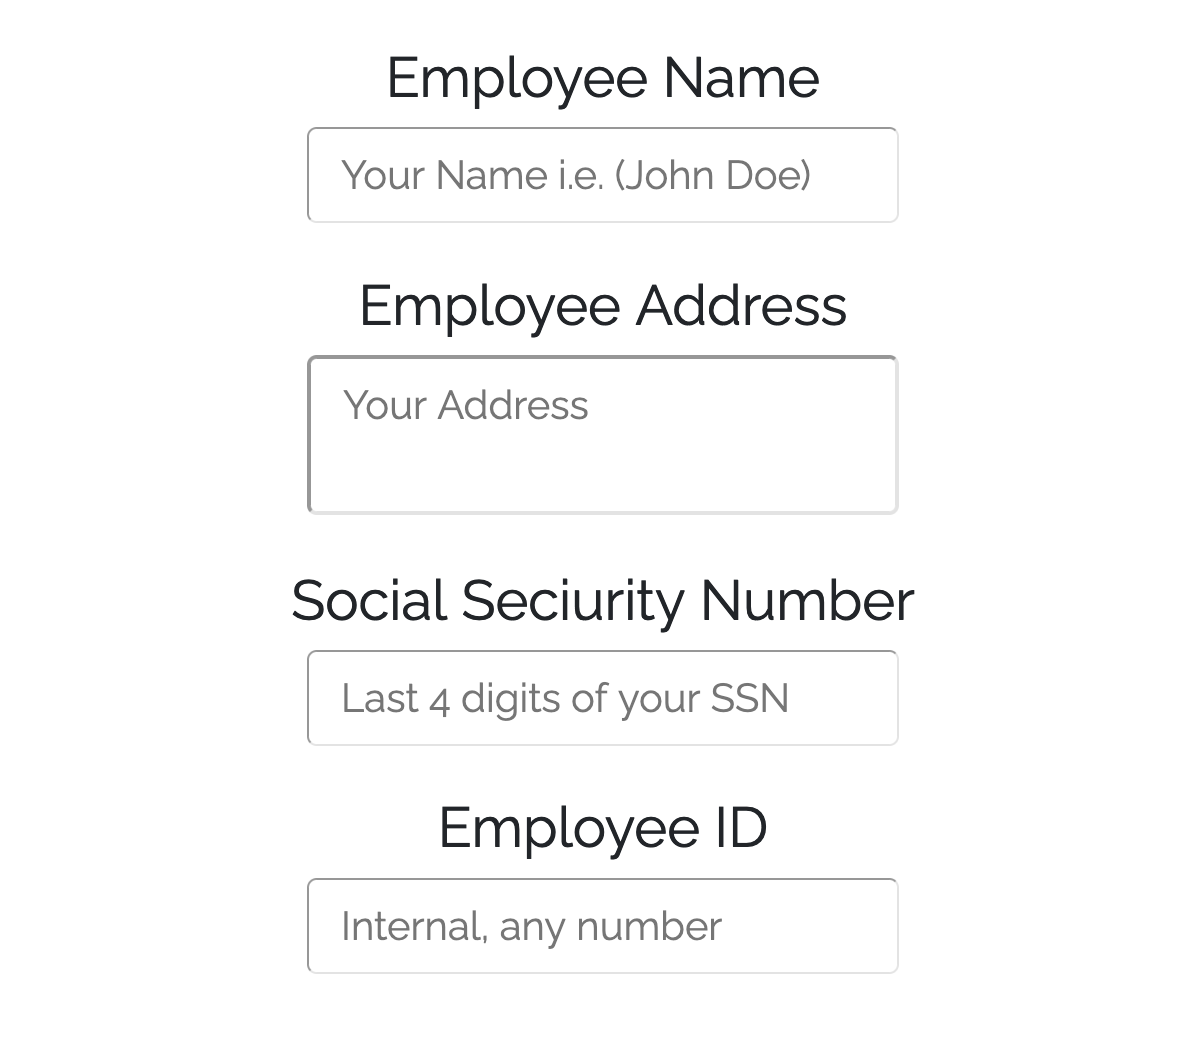
Input the employee's name, address, the last four digits of their Social Security number, an ID for the employee within your company (if applicable), state of residence, family status, bank name, the last four digits of their bank account number, and any used sick hours (if applicable).
We prioritize data security, hence we have implemented industry-grade encryption standards to ensure the safe transmission of your data. Both the active session and transmitted data are securely encrypted, ensuring your employee data remains protected.
3.3. Company Information
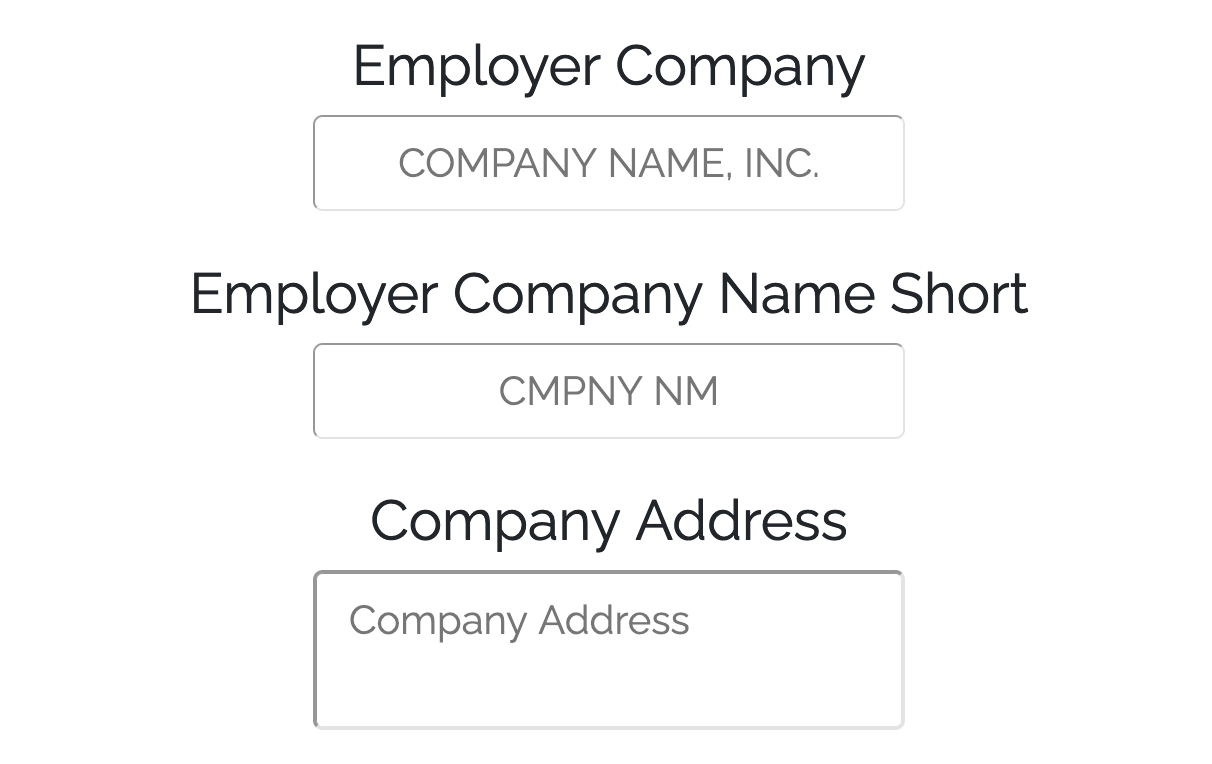
Please input your company's full name, such as "Acme LLC", alongside the abbreviated or more commonly used name, such as "Acme".
Also, don't forget to include your company's physical address.
3.4. Check Information
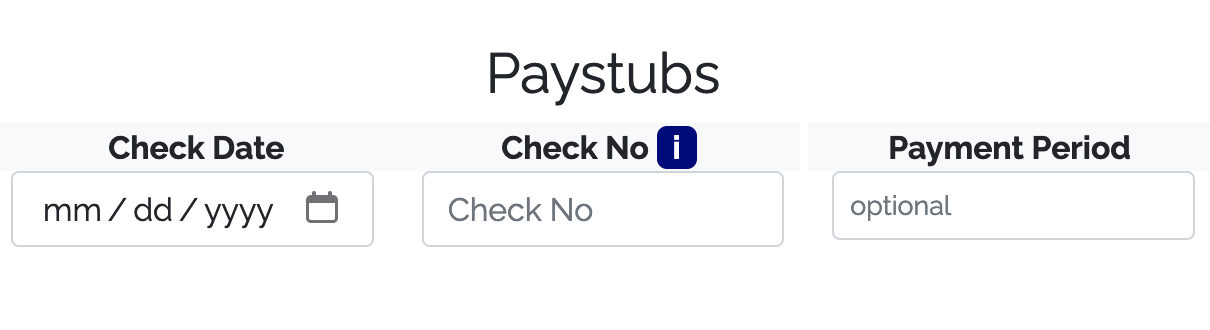
Input the check date, which should correspond to the date you initiated the bank transaction. You should also add your company's internal check number, for example, "19". This number will assist you with future bookkeeping. The payment period will be automatically calculated based on the payment frequency and check date, but you can adjust it if necessary.
3.5. Earnings Information
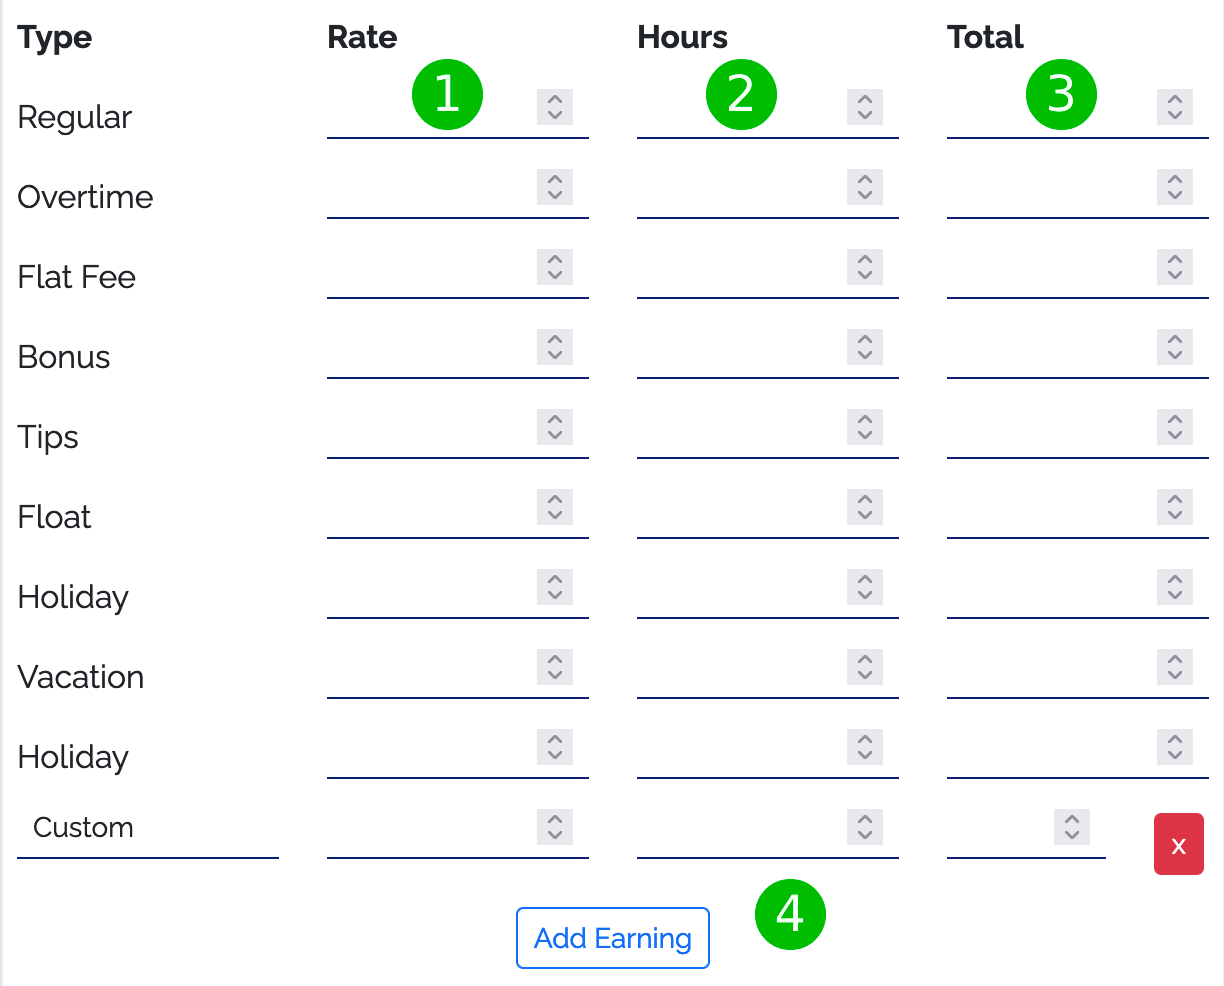
For an "Hourly" payment type, the Rate (1) and Hours Worked (2) must be specified. The total payment (3) will then be automatically calculated based on the provided rate and
worked hours.
Alternatively, if the payment type is "Salary", the Rate (1) and Hours Worked (2) fields are optional. You only need to enter the Total Regular Earnings (3). Additionally, there are predefined earning sources such as
"Tip", "Bonus", and so on. However, if you need to include other types of earnings, you can easily add custom earnings by clicking the "Add Earning" (4) button at the bottom of the form.
3.6. Deductions Information
When
filling out this section, precision is key. If your accountant hasn't computed all types of deductions, we recommend using an online payroll tax calculator such as the ADP Salary Paycheck Calculator.
Please provide deduction
information like Federal and State Taxes, Social Security, Medicare, and SDI if applicable in your state; otherwise, leave these fields blank.
If there are other specific deductions, you can easily add them by clicking the "Add Deduction" button. This allows you to enter benefits like a 401K or Pre-Tax Medical deductions.

3.7. Review the Information
Please thoroughly review all the information you've entered. By clicking on the "Calculate Net"
button, you can confirm if the earnings and deductions were filled in correctly.
It's important to note that our support team doesn't have access to your data, meaning we cannot correct mistakes after you've downloaded your files.
Therefore, we strongly advise you to double-check all entered information.

3.8. Preview the File
After clicking the "Preview" button, you'll see a watermarked version of the file. Please ensure that all formatting, particularly addresses, are correctly aligned in your document. For instance, if the company address is long and appears cut-off in the preview, you can close the preview window and add a line break (using the enter/return key) in the address text box, putting the city, state, and zip code on a new line.
3.9. Pay and Download
Rest assured, we never store your credit card information. For the safety of both our company and our customers, we use Stripe for
payment processing.
Enter your credit card details, apply a promo code (if you have one), and provide the email address where the files will be sent. Once the payment is successful, your browser will automatically begin to download the
file. In addition, you'll receive an email containing the file at the provided email address.
4. Conclusion: Simplifying Payroll with Self-Reliance
These nine steps are a comprehensive guide to creating authentic paystubs for your employees or yourself if you're self-employed. Following this guide will ensure your paystubs are accurate, professional, and compliant. While the process may seem complicated at first, you'll quickly become accustomed to it, ultimately saving time and money on external payroll services. It's another step towards becoming self-reliant and better understanding the financial workings of your business. As always, ensure all information is accurate and double-check before finalizing to avoid potential issues. If you have any questions or need further guidance, feel free to contact us at any time.
Ready to Create Your Paystub?
Follow our simple 9-step guide and get started now!
Start Creating Now